How do I remove the Ethernet from my eero Outdoor 7?
To remove the Ethernet cable from your eero Outdoor 7, unscrew the weatherproof M22 connector that seals the cable to the port. The removal process is the reverse of the assembly steps used during setup.
What is the M22 connector assembly?
The M22 connector assembly consists of three parts:
The connector body (threads into the eero Outdoor 7)
The sealing nut (threads onto the connector body)
The rubber seal (wraps around the Ethernet cable inside the connector body)
Together, these parts create a weatherproof connection that protects the Ethernet port from moisture.
How do I remove the M22 connector?
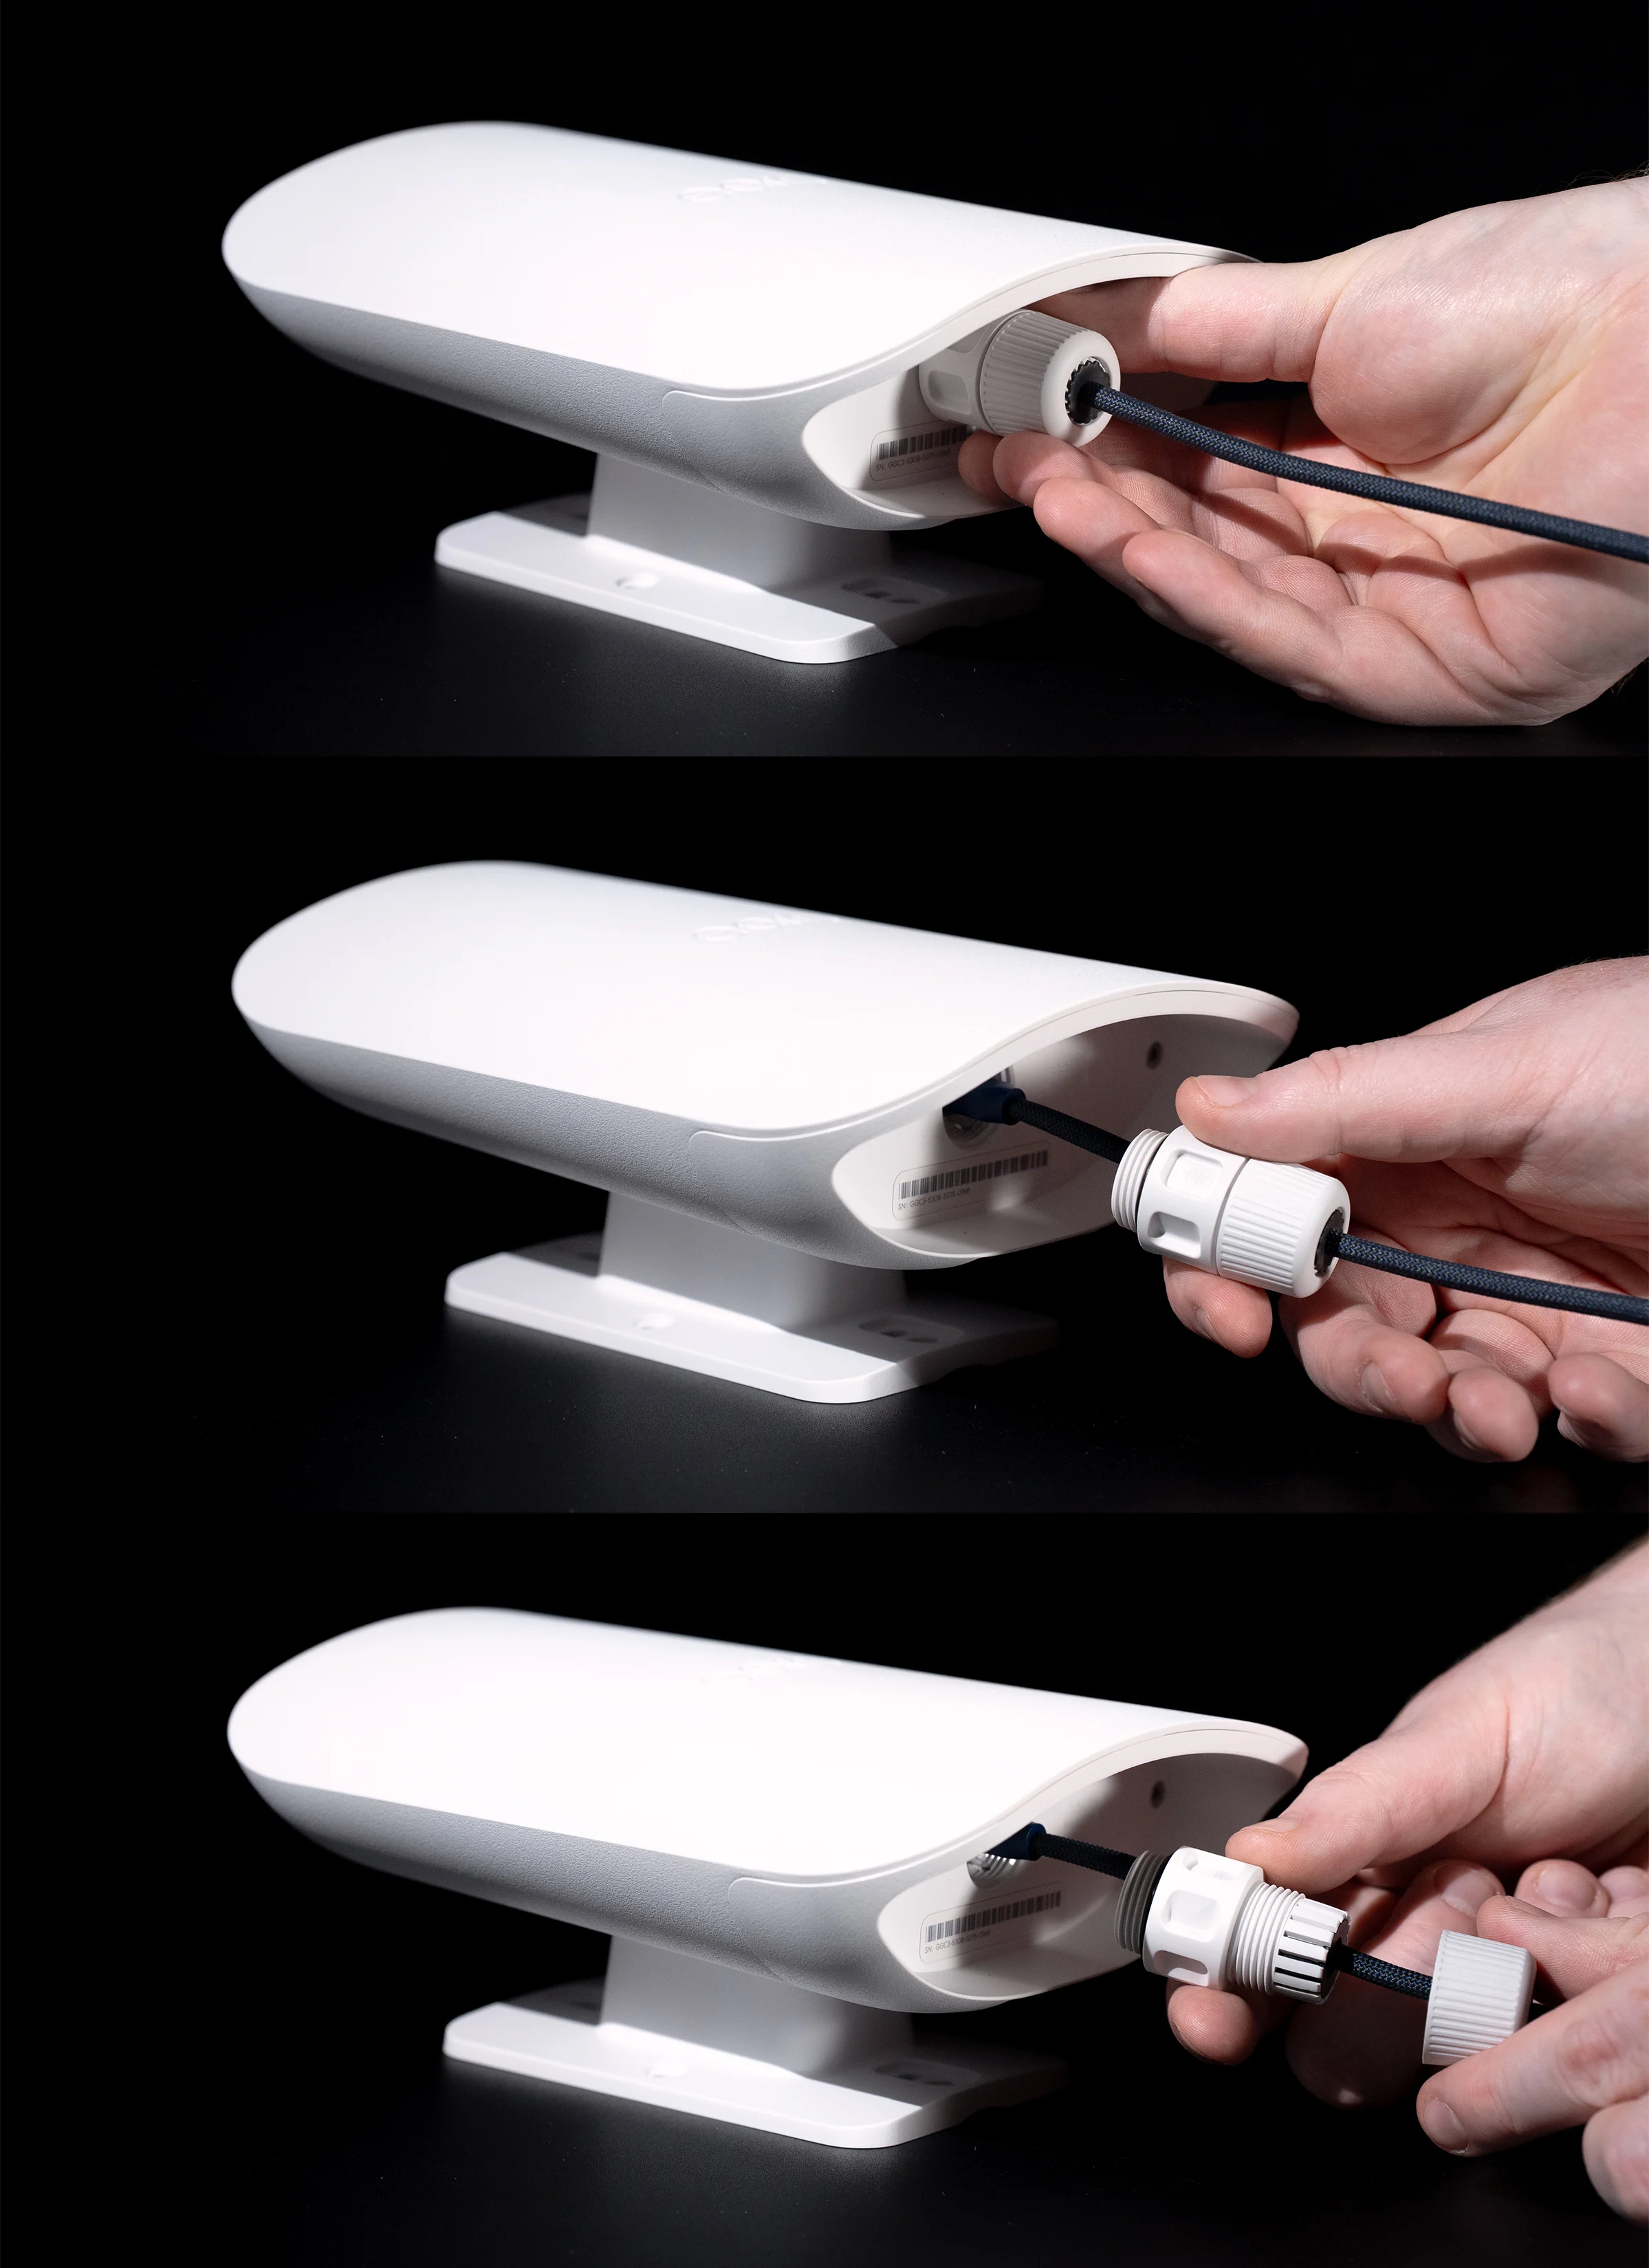
Turn the M22 connector body counterclockwise to loosen and unscrew it from the eero Outdoor 7.
Slide the connector assembly down the Ethernet cable to expose the Ethernet plug.
Unplug the Ethernet cable from the eero Outdoor 7.
Turn the sealing nut counterclockwise to unscrew it from the connector body.
Remove the rubber seal from the connector body and pull the Ethernet cable through.
Remove the rubber seal from around the Ethernet cable.
Slide the sealing nut off the end of the Ethernet cable.
Note: No tools are required for disassembly. All components are hand-tightened during installation and can be loosened by hand.
How do I reassemble the M22 connector?
To reassemble the M22 connector onto a new or existing Ethernet cable, follow the assembly steps in the setup article for the eero Outdoor 7. The assembly process is:
Insert the Ethernet cable through the sealing nut.
Wrap the rubber seal around the cable and push it through the connector body.
Push the rubber seal into the connector body prongs.
Plug in the Ethernet cable and screw the M22 connector into the eero Outdoor 7.
Hand-tighten the sealing nut on the M22 connector body.
Note: Make sure the rubber seal is properly seated inside the connector body before tightening. This maintains the weatherproof seal that protects your eero Outdoor 7.